You can use the Export-CSV cmdlet to export data to a CSV file with headers using PowerShell. This command takes an array of objects as input and creates a CSV file with headers.
The following method shows how you can do it with syntax.
Method 1: Export csv with headers
$processData | Export-CSV -Path $csvFilePath -NoTypeInformationThis example will export $processData to a CSV file with header information.
The following example shows how you can use this method.
How to Export Data to CSV with Headers in PowerShell
The following PowerShell script shows how to export data to a CSV file with headers.
# specify the file path
$csvFilePath = "C:\temp\log\processData.csv"
$processData = Get-Process | Select-Object Name, ID

# export data to csv file with headers
$processData | Export-Csv -Path $csvFilePath -NoTypeInformation
Output:
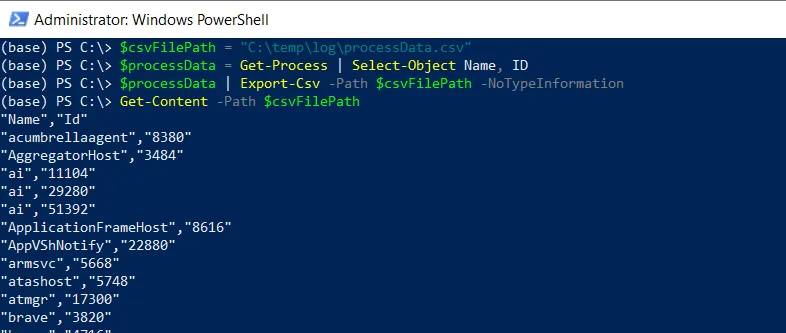
In this script, we define a variable $csvFilePath that stores the csv file path. The $processData variable stores the array of process objects retrieved using the Get-Process cmdlet.
We then piped the $processData to the Export-CSV cmdlet. This command takes the $processData array as input and exports the data to a CSV file at the location specified by $csvFilePath.
The -NoTypeInformation parameter ensures that the exported CSV does not include a header with the object type information.
After running this script, the CSV file will be created with header “Name” and “ID” and rows containing the process name from the $processData array.
Conclusion
I hope the above article on exporting CSV with headers in PowerShell is helpful to you.
You can find more topics about Active Directory tools and PowerShell basics on the ActiveDirectoryTools home page.